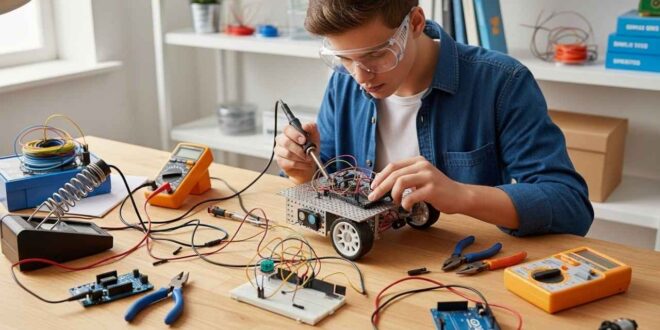
The word ‘robot’ might sound like something from a sci-fi flick, yet kids tinkering in their bedrooms are proving it as real as a laptop. If that idea excites you, you’re in good company. Welcome to home robotics.
Surprisingly, a garage full of tools or a fancy engineering diploma isn’t required for your first build. What pays off is plain old curiosity, a solid game plan, and a handful of everyday supplies.
Plans vary, but good starters stick to gear they can fit on a desk or the kitchen table. No one should feel crushed under a mountain of expensive gadgets.
This guide covers simple, helpful information and walks you through each step, much like a patient neighbor explaining a car repair.
Key Takeaways
- Grab only the tools you truly need at first to keep costs reasonable and the work manageable.
- Short lines of code and tidy wires boost beginners’ confidence more than complex tricks do.
- Safety goggles and a clean table turn a cluttered project zone into a secure workspace.
- Learning to decode a datasheet and test a circuit quietly beats rushing for speed.
- Pull off one small project, and you may discover a hobby that lasts a lifetime.
Start With Simple Knowledge Before You Buy
Shopping sprees are tempting, but pausing to define a basic robot lets you spend money where it counts. A simple chassis, a couple of motors, and a straightforward controller can lay the groundwork without breaking the bank.
Every rookie robot starts with a tiny brain, the microcontroller, a set of sensors that serve as eyes, and several motors that act like muscles. Altogether, those pieces create the machine’s personality.
Jumping in without any gear can be frustrating. Wire strippers, soldering kits, and decent clamps help link, shape, and code those components so they speak to one another.
Simply put, what you buy will depend on what you build. If distance sensors go on the list, affordable jumper cables and a multimeter become essential buddies.
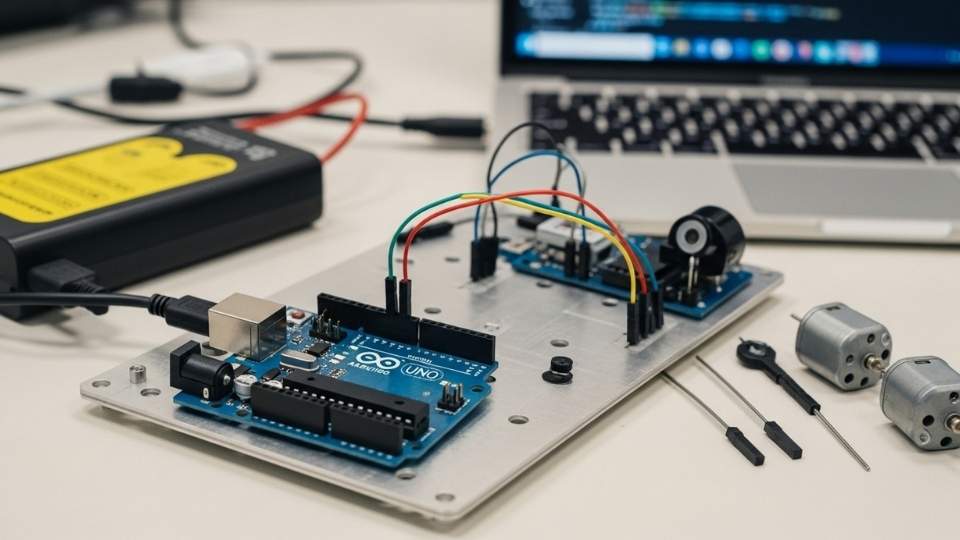
Anyone who plans to upload sketches to an Arduino board using a laptop and a USB cable, because code doesn’t travel by itself. Knowing that upfront prevents wasting cash and keeps the momentum alive. The last thing you want is to reach project hour sixteen and realize your toolkit fell short.
Make Safety Your First Tool
Robotics can be an absolute blast, yet sparks, heat, and the occasional sharp edge are all part of the ride.
That sounds scary, but it just comes down to showing a little respect for the process. Slide on a pair of goggles, and your eyes will thank you later.
Cut wires with caution; even a tiny fragment can spring into the air and disappear like a magician’s trick. If you’re working with delicate circuits, wear an anti-static wristband to prevent your body’s electricity from damaging sensitive chips.
Clear a desk, banish old snack crumbs, and lay everything out where you can see it.
Two minor changes that save time and headaches. Keep soda and lunch at least an arm’s length away, because spills happen faster than we expect.
If you’re under 14, a parent or mentor isn’t just company- they can spot problems before they turn into permanent mistakes.
Essential Hand Tools For Your First Build
Your fingertips do a lot of the heavy lifting in any build, but the right tools turn guesswork into confidence.
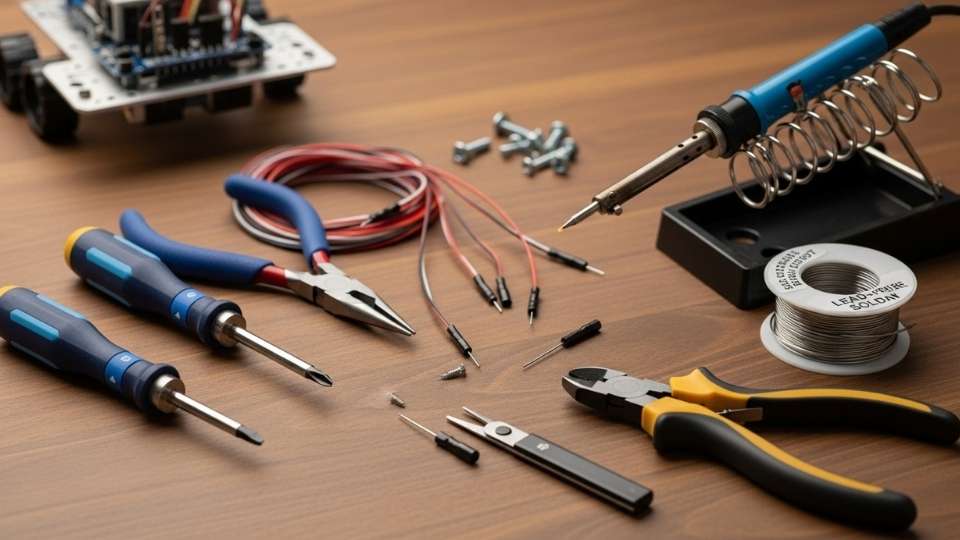
A compact screwdriver set sits at the top of every starter-kit list. A broad, mismatched driver can strip tiny screws faster than you can say Oops.
Choose a kit that covers both flathead and Phillips heads, and you may never stare at a stubborn screw again. With the right tip in hand, half the battle is already won.
Every toolbox should have a sturdy pair of needle-nose pliers. The narrow jaws grip wires in the tightest spots and bend them exactly where you want.
Small corners can eat up time, but those pliers slide in and finish the job before you notice the clock.
A dedicated wire cutter and stripper simplify the messy job of removing insulation, and scissors can’t match that clean, controlled cut.
Many robot kits require wires that remain permanently joined, making a soldering iron and stand a necessity. It tacks the strands together in seconds and looks neat afterward.
Pick up a spool of solder wire, too. A low-temperature, lead-free blend is best, and maintaining good ventilation helps keep your lungs healthy.
Accurate Measuring Tools Help Prevent Errors
Measurements are the difference between a smooth build and a ruined part. A plastic or metal rule handles most cuts, but a caliper zeroes in on gaps with decimal-point precision.
That pinpoint accuracy shines when you’re wedging a sensor or tiny circuit board into its final home.
Always stash a marker or mechanical pencil within arm’s reach. One quick dot on the wall shows exactly where a drill bit should bite, and a fresh name on a wire saves a lot of guessing later.
Sure, tagging each strand looks tedious while you’re in the zone, yet that same label feels like a lifesaver during the midnight panic of a misfiring robot.
Working With Wires And Circuits At Home
Every robot is just a box of nerves and wires. That nervous system needs a little TLC if it hopes to move or blink.
Grab a breadboard if you haven’t already done so. It’ll hold your parts in place, letting you experiment without the smoke and smell of solder.
Slip in jumper wires next. They’re cheap, bright, and, best of all, you can yank them out and reuse them tomorrow.
Keep a multimeter close by, too. A quick dial tells you whether juice is flowing or if your whole night was one long, silent beep. Learning the basics of that gadget can save a rookie more headaches than any fancy textbook.
Once the soldering iron gets hot, shrink tubing becomes your best friend.
Pop a sleeve over raw metal and, bam, you get a tidy, shock-free finish. Mistakes happen, so having a solder sucker ready to spit out extra solder is pure lifesaver stuff; it might even rescue that one pad that looked perfect five seconds ago.
With just a handful of tools like these, you can poke, prod, and polish a circuit until it finally does what you told it to do-instead of what it felt like doing.
Free Software Tools That Students Should Use
Now let your fingers drift from wires to windows. Every robot needs a brain, and that software squishes dozens of Uploadommands into one tidy upload.
Arduino uploads at the top of most people’s lists for a reason: it’s free, friendly, and it plugs straight into any compatible board you throw. Open a sketch, upload, and wait for the upload to complete.
Plenty of other open-source editors exist, too.
PlatformIO, for example, tucks right inside Visual Studio Code and offers an even deeper toolbox if you crave bells and whistles.
Just remember that a great bot works once the code feels less like magic and more like muscle memory.
The first thing to note is that the Arduino software is entirely free and can be installed with just a few clicks.
Still sweating over commas or curly braces? TinkerCAD’s drag-and-drop blocks let you watch commands click together in real-time, no messy grammar; lights blinking, and motors spinning.
Fritzing takes that same hands-on spirit and layers it onto a neat circuit diagram. One look at the sketch shows exactly where electrons will cruise, and, yes, the program won’t cost you a dime.
Even so, pausing to peek at raw code inside Notepad++ or Visual Studio Code is an innovative practice. Spotting a missing semicolon or a rogue bracket already puts you half a step toward coder confidence.
Microcontroller Tools And How To Use Them
Inside nearly every student-built robot, you’ll find an Arduino Uno sitting like the brain in a game console.
Hook it to your laptop with a run-of-the-mill USB cable. For field tests, a battery pack or portable charger keeps the scene alive when the screen closes.
Bolting the board to a mount plate stops wires from yanking loose during those sweat-till-it-works trials. Strong bases keep weak connections from becoming your biggest headache.
Drivers must load before anything else. Once that silent handshake is done, whatever sketch you upload pulses life into motors, sensors, and maybe a little bit of magic, too.
The control is your robot’s head office. Figuring out how to code it often becomes the highlight of the entire project.
Controlling Movement With Motors
No bot can wiggle, yank, or cruise without a set of motors. Start small- some compact DC motors or friendly little servos will do the trick.
Pick up an L298N driver board so the chips can control the motor through a handful of screw terminals; a quick turn with a screwdriver, and you’re locked in.
Motion is the spark that jolts your robot to life. Run the tests at a crawl and tweak settings as you watch what happens. Perfection on the first try is a nice dream; reality usually yawns and moves sideways.
Sensing The World With Basic Sensors
A clever robot doesn’t just shuffle – it reacts like it has just woken up. Bolt on an ultrasonic sensor, and the chassis can eyeball walls before bouncing off them.
Infrared bits add the ability to feel heat or spot a twitch of nearby light.
Snag a roll of jumper wires, match the pins, and follow the tiny data sheet that comes in the box. Following those diagrams is a workout for patience and a warm-up for coding.
Start by testing a single eye, then mash two or three together when the jitters calm down. Each step builds confidence, even if the first few attempts look a little drunk.
Putting It All Together With Assembly Parts
When the parts arrive, a few basic tools turn a pile of plastic and metal into something that moves.
Zip up small screws and bolts in a tidy organizern they vanish faster than you think.
A hot-glue gun is a quick way to fasten bits that will never have to flex. For sections you might want to peel apart later, good double-sided tape is, in fact, hard to beat.
That custom from cardboard, as a snap-together 3D shell, looks great in sketches, but always check the fit before committing.
One slow slice beats replacing a whole section. Please doo the same with glue; tack it down lightly first, then tighten the bond once you know everything lines up.
Extra Tools That Make A Big Difference
Technically, you could build everything with a screwdriver and good luck, yet a few gadgets shortcut the struggle.
A mini drill opens neat holes where wiring or bolts pass, and a Dremel cleans ragged edges faster than sandpaper can dream.
Clap the piece in a small bench vise, and both hands stay free for the next step.
None of this gear is your ticket to victory, but it saves an hour or two once the project gets real.
Balanced robots tilt or topple, so weighing the chassis on a tiny scale helps catch problems before they roll. Finally, stash everything in a sturdy toolbox; loose parts scatter like confetti between weekends.
How To Buy Smart On A Budget
Building your first robot doesn’t have to drain your pocket money. Many websites offer comprehensive kits that bundle everything a beginner needs, including tools, wires, sensors, and often a microcontroller, in one convenient package.
A quick stroll through a neighborhood electronics shop can surprise you; single parts there might cost less than shipping an online order.
Before you spend a dime, check with your school. Many programs keep spare gear, and some teachers hand out discounts to students who ask.
Club membership can also be a money-saver. Robotics groups often circulate tools and spare parts, so you borrow instead of buying.
Don’t think you have to load up on every gadget right away. Pick just what lets you finish one small robot, then build the collection as projects stack up.
Keep It Simple And Keep It Fun
On your first build, keep the design simple, like a toddler’s robot that rolls straight or dodges a wall.
Chasing perfection too early only frustrates beginners; the real education lies in making mistakes.
Scribbling notes at the workbench helps, even if the handwriting looks chicken-scratch. j
Log daily wins and flops so the next attempt isn’t a replay of the same blunder.
Showing your progress online or to a friend feels good, and it might inspire someone else to start tinkering.
Mistakes You Will Make And That’s Okay
Failure is built into the learning process. A stubborn motor might refuse to budge, or a code glitch could freeze everything.
Maybe you accidentally soldered the wrong wire, and that honestly happens to everyone. Recheck your connections, give the datasheet a second look, and, seriously, take a deep breath.
Messing up once is part of the fun because the next time you touch a hot iron, you’ll already be smarter.
Buying every shiny gadget in the catalog feels good until the drawer gets too crowded. Pick a decent soldering iron, a small set of bits, and let the project teach you what else you need. Sometimes less is more, no kidding.
Safety rules aren’t boring; they’re insurance against a bad Tuesday.
Read the sticker, keep the table tidy, and stop scrolling to give your eyes a real break. Rush today, and tomorrow you’ll be slowed down by a simple cut or a popped fuse.
My Opinion
Wiring up a first robot in the living room beats binge-watching another show, if you ask me. You dont need exotic boards or a fat budget, just a little grit and some luck.
Patience is the unsung hero; hurry, and watch the magic disappear.
Every tool you grip for the first time feels stiff, but that stiffness fades once the machine starts twitching.
Messing up a skid-steer code only makes the next debug seem laughably easy. In short, the very wobble that frustrates today locks in confidence tomorrow.
Each tool you pick up teaches you something. Each connection you make brings your robot to life. And every mistake makes you better for the next build.
 RapTijd


